Espresso Channeling: Why It Happens & Exact Tamping Fix That Works
Channeling is the silent killer of espresso shots. You dial in your grind, dose precisely, tamp carefully - and the shot still tastes simultaneously sour and bitter. The problem is not your grind size or your beans. It is water finding weak spots in your coffee puck and rushing through them instead of permeating the entire bed evenly.
The result is over-extraction where the channel forms (bitter, harsh) and under-extraction everywhere else (sour, thin). The fix is a disciplined puck prep chain: WDT distribution to declump grounds, level tamping with consistent pressure, a clean portafilter rim, and pre-infusion to saturate the puck before full pressure hits.
This guide walks through the visual signs of channeling, the root causes, and the exact puck prep workflow that eliminates it.
Affiliate Disclosure: EspressoSnob participates in the Amazon Services LLC Associates Program. We earn commissions from qualifying purchases through our Amazon links at no extra cost to you. We recommend products based on specifications, performance, and value, not commission rates.
Quick Picks - Essential Channeling Prevention Tools
The right tools eliminate channeling before it starts. A WDT tool breaks up grind clumps, a puck screen diffuses incoming water, and proper tamping technique ties it all together.
| Product | Best For | Key Feature | Price Range |
|---|---|---|---|
| Normcore WDT Tool V2 | Even distribution | 0.3mm needles, magnetic stand | $25-$35 |
| Normcore WDT V2.1 Walnut | Premium declumping | 0.23mm needles, 16 spares | $35-$45 |
| Espresso Puck Screen 58mm | Water dispersion | 0.9mm thick, 150-micron mesh | $8-$15 |
What Causes Channeling
Water under pressure takes the path of least resistance. If your coffee puck has any variation in density - a clump here, an air pocket there, a region that is slightly less compressed - water will preferentially flow through the weak spot.
The primary causes are clumpy grinds, uneven distribution in the basket, and unlevel tamping. Secondary causes include grind size extremes (too coarse or too fine), overfilling the basket so the puck touches the shower screen, and machine issues like excessive brew pressure or clogged dispersion screens.

Uneven Grind Distribution
When coffee grounds pile higher on one side of the basket, water rushes through the lower side. Even a 2mm difference in puck depth creates a channel. This is why you never skip distribution - dumping grinds directly from the grinder into the basket, then tamping, almost guarantees channels. The center will be denser than the edges.
Clumping and Fines Migration
Static-cling clumps force water around them. Worse, very fine particles (fines) can migrate downward during tamping and clog pores in the basket, forcing water sideways into a channel. This is called fines migration, and it creates zones of very high density next to zones of low density.
Inconsistent Tamping
Tamping at an angle creates a tilted puck with a thin edge where water breaks through instantly. Also, tamping too hard does not cause channeling - pucks become impermeable only at extreme pressure - but an uneven tamp does. The common wisdom of pressing with 30 pounds of force is misleading. Research by Socratic Coffee and Barista Hustle showed no measurable extraction difference between 15 pounds and 50 pounds of tamping force. What matters is levelness and consistency.
Grind Size Extremes
If your grind is too coarse, the puck does not offer enough resistance. Water blasts through in 15 seconds, fracturing the puck like a dried riverbed. Paradoxically, an ultra-fine grind can also cause channeling - it clogs the basket completely, pressure builds until a sudden punch-through channel erupts, often visible as one violent spurt mid-shot.
Visual Signs of Channeling
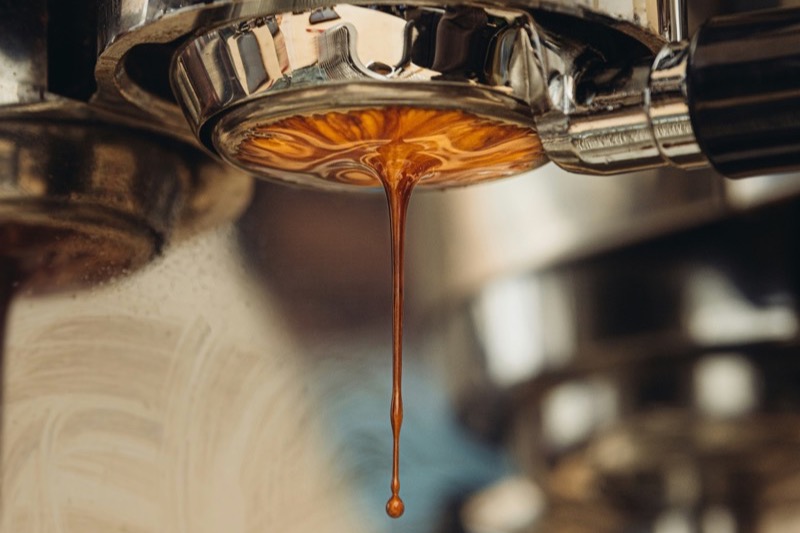
The most dramatic show of channeling is when you get sprays coming out of the side of your basket or uneven streams from a naked portafilter. Here is what to look for:
- Uneven flow from the basket: Ideally the whole bottom of your basket screen is covered in espresso extraction. If you are getting gaps or it is coming through one side quicker than the other, that is channeling.
- Spraying from the sides: Water breaking through the edge of the puck and spraying horizontally from a naked portafilter is a dead giveaway.
- One pale stream early: A single fast, pale stream appearing in the first 5 seconds while the rest of the puck is dark indicates a channel formed immediately.
- Cracked puck after the shot: When you knock out the spent puck, if you see cracks, fissures, or a cratered surface, water channeled through those weak spots.
Taste signs are subtler but consistent: simultaneous sour and bitter notes, thin body even with a proper dose, and inconsistent flavor shot-to-shot with identical grind and dose. If you are getting both sour and bitter at the same time, stop adjusting grind and focus on puck prep. A naked portafilter removes all ambiguity - if you see spraying or uneven flow, it is channeling regardless of what the grind setting is.
The Proven Puck Prep Chain
Preventing channeling is a workflow, not a single trick. Each step fixes a specific cause. Skip one and you reintroduce the problem. This is the chain that works:
Step 1: Dose and WDT Distribution
Dose your coffee into the basket. Before tamping, use a WDT tool to stir the grounds. Push the needles all the way to the basket screen and stir the entire depth of the coffee bed in a circular motion. This breaks up clumps and distributes grounds evenly.
The Normcore WDT Tool V2 is the most popular option - its seven fine 0.3mm needles break up clumps thoroughly, and the magnetic stand keeps everything tidy. For even finer declumping, the Normcore WDT V2.1 with walnut handle uses 0.23mm needles and includes 16 spares.
After stirring, gently tap the portafilter on the counter once to settle the grounds. Then use the side of your index finger to sweep across the top of the grounds, collapsing any mound into a flat bed. The goal is a flat, even surface for tamping.
Step 2: Level Tamping
Tamping compresses the loose bed into a coherent puck that can resist 9 bars of pressure. What matters in tamping:
- Level: The tamp must be perpendicular to the basket. An angled tamp creates a wedge-shaped puck where one side is thinner and less dense. Water channels through the thin side. Use a calibrated tamper with a spirit level built in, or practice on a bathroom scale while watching a mirror.
- Firm enough to compress: Press until you feel the grounds stop compacting. Beyond that point, additional force does nothing - the puck is already at its maximum density for that grind size. Around 20-30 pounds of pressure is a general guideline, but the most important thing is consistency.
- No twist on release: The old barista trick of twisting the tamper as you lift it is harmful. It shears the top surface of the puck, creating a loose layer that the shower screen disrupts when you lock in the portafilter. Press straight down, press straight up.
Step 3: Clean the Portafilter Rim
Before locking the portafilter into the group head, wipe the rim of the basket with your finger. Loose grounds on the rim break the seal between the basket and the group gasket, creating a gap where water bypasses the puck entirely.
Step 4: Use a Puck Screen (Optional but Effective)
A metal mesh puck screen (1.7mm thick, 150-micron mesh) sits on top of your tamped coffee. It diffuses the incoming water jet from the group head, preventing the initial drill-through effect that starts channeling. Many home baristas report eliminating 90% of channeling overnight with a puck screen.
The Dioomod 58mm puck screen is an affordable option - 0.9mm thick with over 12,000 filtration holes at 150 microns. It does not fix poor distribution or unlevel tamping, but it adds a margin of error for the inevitable small inconsistencies in manual puck prep.
Step 5: Pre-Infusion
Most semi-automatic machines have pre-infusion (low-pressure wetting). If yours does, use it. Pre-infusion is a period of low-pressure water contact (2-4 bars for 5-10 seconds) before the pump ramps to full 9-bar extraction. It gently saturates the puck, closing micro-cracks before high pressure hits.
Manual pre-infusion: turn on the pump for 3 seconds, stop for 3 seconds, then run full pressure. Some baristas extend pre-infusion to 15-20 seconds at 2 bars - this is called blooming and produces extraordinarily even extraction, though it extends total shot time to 40-50 seconds.
Dialing In Your Grind to Prevent Channeling
Proper grind size reduces channeling risk. Aim for 18g in, 36g out in 25-32 seconds. If your shot pulls in under 22 seconds, grind finer (one full number on your grinder). If it takes over 35 seconds, grind coarser (but only slightly). Give the grinder 2-3 shots to stabilize after an adjustment.
If you are getting many fine clumps and uneven extraction, your grinder may produce too many fines. Consider upgrading burrs or sifting grinds. Bimodal particle distribution (lots of fines and boulders, few medium particles) makes channeling almost inevitable no matter how good your puck prep is.
Machine Maintenance and Channeling
If you have fixed distribution, tamping, and grind, and channeling persists, check your machine:
- Brew pressure: Too high (above 10 bars) shreds pucks and causes channeling. Install a pressure gauge if your machine does not have one, and adjust the OPV (over-pressure valve) to deliver 9 bars at the group head.
- Shower screen: Remove and clean the shower screen. A single blocked hole can cause jet streams that drill through your puck. Backflush weekly to prevent coffee oil buildup.
- Group gasket: A worn group gasket does not seal evenly around the portafilter. Water leaks around the edge instead of through the puck. Replace the gasket if you see water dripping from the portafilter rim during extraction.
- Basket condition: Inspect your basket for blocked or damaged holes. Hold it up to the light - you should see light through every hole. A worn basket with uneven hole diameter distributes water unevenly.
Troubleshooting Persistent Channeling
Here are specific symptoms and fixes:
| Symptom | Likely Cause | Fix |
|---|---|---|
| Spraying from basket | Uneven tamp + coarse grind | Level tamp, then grind finer |
| One pale stream early | Poor distribution | Use WDT tool before tamping |
| Puck has cracks after shot | Too fine grind or too much coffee | Reduce dose by 0.5g or grind coarser |
| Shot starts fine, then spurts | Fines migration clogging basket | Clean grinder burrs, use puck screen |
| Channeling only with light roasts | Lack of pre-infusion | Add manual pre-infusion step |
The 2026 Verdict
Channeling is not a grind problem or a bean problem. It is a puck prep problem. The fix is not in the machine settings or the grind size - it is in how the grounds sit inside the basket. A proper puck prep chain (WDT, level, tamp, clean rim) eliminates most channeling issues. Adding pre-infusion via pressure profiling eliminates the rest.
Make it automatic. Every shot, every time: dose, WDT, level, tamp, wipe rim, lock in, pre-infuse. Once this workflow is muscle memory, channeling becomes the exception instead of the rule.
Related Guides
- Espresso Tastes Sour or Bitter? Grind Size & Extraction Time Fixes
- Gaggia Classic Pro Real Daily Use Review: Budget Espresso That Actually Works
- Best Espresso Grinder Under $300 for Home: Niche Zero vs Baratza Sette
- How to Clean Espresso Machine - Complete Guide 2026
Frequently Asked Questions
What is espresso channeling?
Espresso channeling occurs when pressurized water finds weak spots in your coffee puck and rushes through them instead of flowing evenly through the entire coffee bed. The result is simultaneous over-extraction (bitter, harsh) where the channel forms and under-extraction (sour, thin) everywhere else. You see it as uneven streams or spraying from a naked portafilter.
How do I know if my espresso is channeling?
Visual signs: uneven flow from the basket (one side darker, faster streams), spraying from the sides of a naked portafilter, one pale stream early in extraction, and a cracked or cratered puck after the shot. Taste signs: simultaneous sour and bitter notes, thin body even with a proper dose, and inconsistent flavor shot-to-shot with identical grind and dose.
Does tamping pressure cause channeling?
Tamping pressure matters less than levelness and consistency. Research by Socratic Coffee and Barista Hustle found no measurable difference between 15 pounds and 50 pounds of force. What causes channeling is an angled tamp or inconsistent pressure that creates a wedge-shaped puck. Water channels through the thin side. Focus on keeping the tamper perfectly level, not pressing harder.
What is the WDT technique?
WDT (Weiss Distribution Technique) uses a fine needle tool to stir coffee grounds in the basket before tamping. Push the needles all the way to the basket screen and stir to break up clumps and distribute grounds evenly. This prevents density variations that cause channeling. The Normcore WDT Tool V2 with 0.3mm needles is the most popular option.
Does a puck screen prevent channeling?
Yes. A metal mesh puck screen (1.7mm thick, 150-micron mesh) sits on top of your tamped coffee and diffuses the incoming water jet from the group head. This prevents the initial drill-through effect that starts channeling. Many baristas report eliminating 90% of channeling overnight with a puck screen. It does not fix poor distribution or unlevel tamping, but it adds a margin of error.
What is pre-infusion and does it reduce channeling?
Pre-infusion is a period of low-pressure water contact (2-4 bars for 5-10 seconds) before the pump ramps to full 9-bar extraction. It gently saturates the puck, closing micro-cracks before high pressure hits. This reduces channeling significantly. Manual pre-infusion: turn on the pump for 3 seconds, stop for 3 seconds, then run full pressure. Some machines have automatic pre-infusion; use it.
Can grind size cause channeling?
Yes, in two ways. Too coarse: the puck does not offer enough resistance, water blasts through in 15 seconds, fracturing the puck like a dried riverbed. Too fine: an ultra-fine grind clogs the basket completely, pressure builds until a sudden punch-through channel erupts. Aim for 18g in, 36g out in 25-32 seconds. If shot pulls under 22 seconds, grind finer. If over 35 seconds, grind slightly coarser.
Why do I still get channeling after fixing distribution and tamping?
Persistent channeling despite good puck prep points to: (1) a grinder producing extremely bimodal particle distribution (lots of fines and boulders, few medium particles), (2) a worn or damaged basket with blocked or uneven holes, (3) a worn group gasket that does not seal evenly around the portafilter, or (4) a clogged shower screen. Check your machine pressure - over 10 bars shreds pucks and causes channeling.
Affiliate Disclosure: EspressoSnob participates in the Amazon Services LLC Associates Program, an affiliate advertising program designed to provide a means for sites to earn commissions by linking to Amazon.com. We earn commissions from qualifying purchases made through our Amazon links at no additional cost to you. These commissions support our research, testing, and content creation. We recommend products based on specifications, performance, and value, not commission rates.
Photos provided by Pexels.