7 Espresso Grinder Mistakes Ruining Your Shots (And How to Fix Them)
EspressoSnob is reader-supported. When you buy through links on our site, we may earn a small commission at no extra cost to you. This never influences our recommendations.
Your grinder controls espresso quality more than your machine does. A $200 machine with a $400 grinder will pull better shots than a $1,200 machine with a $100 grinder. But even expensive grinders fail when you make these seven mistakes.
Most home baristas waste beans, damage burrs, and chase phantom variables because they don't understand how grinder adjustments actually work. The grinder isn't forgiving. One wrong move compounds into weeks of frustration.
These mistakes show up in forums every day. You adjust, pull a shot, taste bitterness, adjust again, and suddenly you're chasing your tail. The fix isn't a better grinder. It's understanding what happens inside the burrs when you turn that dial.
Mistake 1: Adjusting More Than 1 Step at a Time
The temptation: your shot runs 18 seconds, you want 27 seconds, so you jump 5 steps finer to "save time." Now your shot chokes at 45 seconds. You go back 3 steps. It runs 22 seconds. You're lost.
Grind adjustment is iterative, not binary. Each step changes extraction time by 2-5 seconds depending on your grinder's micro-step resolution. If your shot runs fast at setting 10, move to 9 and test. Then 8 if needed. Small moves let you bracket the target.
Stepless grinders (Niche Zero, DF64, Eureka Mignon) are even more sensitive. A quarter-turn can swing extraction by 8 seconds. Stepped grinders (Baratza Sette, Breville Smart Grinder Pro) give you fixed intervals, but the principle is the same: one step, one test shot.
Large jumps waste beans and time. You'll spend three shots walking back from a choke instead of spending three shots walking into the pocket from a fast pull. Always move in the direction of your target, not past it.
The Fix
Move 1 step, pull a shot, taste or time it, move again. If your shot runs 20 seconds and you want 27 seconds, that's roughly 3-4 steps finer. But you get there by testing at 1-step intervals. Mark your starting point with tape or a photo. If you overshoot, you can walk back precisely.
Log your settings in a notebook: grind setting, dose, time, tasting notes. After 2-3 bags of beans, you'll see patterns. Medium roasts from the same roaster might always land at setting 7. Light roasts at 5. This history shortens dialing time.
Mistake 2: Not Purging After Adjustment
Retention is the silent variable. Every grinder holds grounds between the burrs, in the chute, and in the exit spout. This ranges from 0.5g in single-dose grinders (Niche, Fellow Ode) to 2g in hopper-style grinders (Eureka, Breville). When you adjust, those old grounds are still sitting there at the old setting.
You dial finer, dose 18g, and pull a shot. But the first 1g of that dose is old grounds from the previous setting. Your actual grind distribution is a blend of two settings. The shot behaves unpredictably.
This mistake is invisible. You blame the beans, the machine, or your tamp. You don't realize the grinder is giving you yesterday's grind mixed with today's.
The Fix
Purge 1-2g of beans after every grind adjustment. Run the grinder, discard the output, then dose for your real shot. Single-dose workflows make this easier: weigh 18g, grind it, purge with a bellows or RDT, and you're clear. Hopper workflows need manual purging: grind 2g into the trash after each adjustment.
If you change beans, purge 3-4g to fully clear old oils and fines. Switching from dark to light roast without purging will leave bitter dark roast residue in your light roast shot. You can't taste the new bean cleanly.
Some grinders (Mahlkönig E65S GBW, Baratza Sette 270Wi) have electronic dosing that reduces retention below 0.3g. These still benefit from a 1g purge after adjustments, but the problem is smaller.
Mistake 3: Adjusting While the Grinder Is Running
Grinders are built to hold the burr gap steady under rotational force. When you adjust the dial during grinding, you're applying lateral torque to the burr carrier. This can:
- Chip the burrs (especially ceramic burrs in entry-level grinders)
- Bend the adjustment collar
- Strip the threading on stepped grinders
- Put asymmetric load on the motor, shortening its lifespan
High-end commercial grinders (Mazzer, Compak, Mahlkönig) sometimes allow on-the-fly adjustment because their motors and frames are built for it. Home grinders are not. The motor is smaller, the frame is plastic or thin aluminum, and the adjustment mechanism is not reinforced for live loads.
You won't feel the damage immediately. But after 6 months of adjusting under load, you'll notice grind consistency drop off, the dial will feel loose, or you'll hear new grinding sounds from the motor.
The Fix
Stop the grinder, adjust, then restart. It takes 3 extra seconds. If you're single-dosing, this is automatic because you grind in batches. If you're using a hopper, empty the portafilter, stop the motor, turn the dial, then grind the next dose.
Some grinders lock the adjustment collar during grinding (Niche Zero). This is a feature, not a limitation. It protects the burrs and motor from lateral stress.

Mistake 4: Ignoring Retention When Troubleshooting Inconsistency
You dial in a perfect shot at 9 AM. At 2 PM, you pull another shot with the same settings. It tastes sour and runs 5 seconds faster. You didn't change anything. What happened?
Retention. The grinder held 1-2g of grounds from your 9 AM session. Those grounds sat for 5 hours, oxidized, and compacted in the chute. When you dosed at 2 PM, that stale clump came out first, reducing effective dose and changing particle distribution.
This problem is worse with fluffy light roasts and single-dose workflows. Light roast grounds are less dense and cling to the chute walls with static. You think you dosed 18g, but 17g made it to the basket and 1g is stuck in the grinder.
Humidity makes it worse. On humid days, grounds absorb moisture and clump more. Your dialed-in setting from a dry winter morning won't work the same way on a humid summer afternoon.
The Fix
Use RDT (Ross Droplet Technique) or a bellows to reduce retention. RDT: spray 1-2 drops of water on beans before grinding. This eliminates static, prevents clumping, and drops retention from 1.5g to under 0.5g. The water doesn't affect extraction because it's absorbed by the bean surface before grinding.
Bellows: single-dose grinders with bellows attachments (Niche, DF64 with aftermarket bellows) let you push trapped grounds through the chute. Pump the bellows 3-4 times after grinding. You'll see 0.3-0.8g of fines drop into the portafilter.
If your grinder has high retention (Breville Smart Grinder Pro, older Baratza models), accept that the first shot of the day will be off. Purge 2g, then dose your real shot. Budget for that waste in your bean cost.
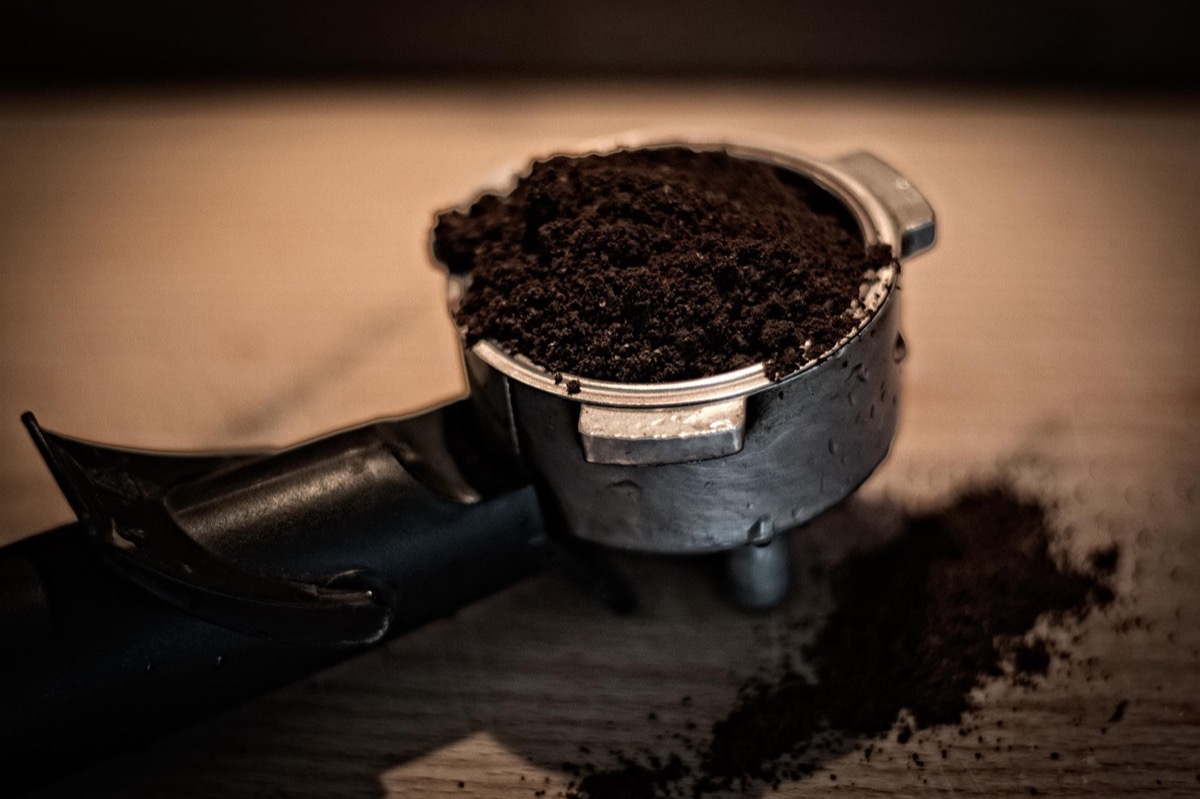
Mistake 5: Chasing Grind Size Instead of Dose or Tamp
Espresso has three primary levers: grind size, dose, and tamp pressure. Most people fixate on grind size because it's the most obvious dial. But dose and tamp also control flow and extraction.
If your shot runs 30 seconds and tastes weak, grinding finer might slow it to 35 seconds but won't fix the weak body. The real problem could be under-dosing. You're running 16g in an 18g basket. The puck is thin, water finds channels, and extraction is uneven. The fix is +2g of coffee, not a finer grind.
Same with tamp. If your tamp pressure is inconsistent (20 lbs one shot, 35 lbs the next), your extraction time will swing ±5 seconds even with identical grind and dose. You'll chase grind settings trying to compensate for a tamp problem.
The Fix
Dial in one variable at a time. Start with dose, then tamp, then grind. Fill the basket to its rated capacity (17-19g for a standard double basket). Tamp at consistent pressure (use a calibrated tamper or practice until 30 lbs feels automatic). Then adjust grind to hit 25-30 seconds.
If you change dose, expect to re-dial grind. Adding 1g of coffee increases puck depth by ~1mm, which changes flow resistance. Moving from 18g to 19g might require 1 step coarser to maintain the same extraction time.
If you're pulling 16g in a 20g basket because "my machine can't handle more," your machine isn't the limitation. Basket geometry is. A thin puck creates channeling. Either dose to basket capacity or buy a smaller basket (15g single basket, or a 14g IMS precision basket).
Mistake 6: Not Accounting for Bean Age and Roast Level
Freshly roasted beans (1-7 days off roast) outgas CO₂. This makes the puck more resistant to water flow because gas bubbles create back pressure. A setting that pulls 27 seconds at day 3 might pull 23 seconds at day 10 when degassing has slowed.
Roast level changes extraction even more. Dark roasts are porous and brittle. They grind into more fines and extract faster. Light roasts are dense and harder. They grind into fewer fines and extract slower. If you dial in a medium roast at setting 8, switching to a dark roast at setting 8 will over-extract and taste bitter. Switching to a light roast will under-extract and taste sour.
Most people don't expect to re-dial when they open a new bag of the same roast from the same roaster. But if bag 1 was 5 days off roast and bag 2 is 12 days off roast, they'll behave differently. Beans continue degassing and drying for 2-3 weeks post-roast.
The Fix
Adjust grind as beans age. Fresh beans (1-7 days): grind slightly coarser or reduce dose by 0.5g. Rested beans (8-21 days): standard dialing. Older beans (21+ days): grind finer or increase dose. After 4 weeks, beans lose volatile aromatics and taste flat no matter what you do.
When switching roast levels: expect to move 1-2 steps on your grind dial. Dark roast = coarser or lower dose. Light roast = finer or longer preinfusion. Medium roast is your baseline. If you regularly switch between roast levels, mark your dial positions with tape or log them.
Buy beans with a roast date, not a "best by" date. Roast date tells you freshness. Best by date tells you shelf stability, which is irrelevant for espresso. Beans roasted more than 30 days ago are stale for espresso use.
Mistake 7: Skipping Grinder Maintenance and Wondering Why Dialing Drifts
Burrs accumulate coffee oils, fines, and chaff. Over time, this buildup:
- Reduces the effective burr gap (making your grind artificially finer)
- Creates uneven particle distribution (more boulders and fines, fewer mid-sized particles)
- Adds stale, oxidized flavors to fresh beans
- Increases motor strain and heat
If you notice that your dialed-in setting has drifted over the past 2 months - you started at setting 8, now you're at setting 10 to get the same extraction time - your burrs are dirty. The oil layer is narrowing the gap.
When you finally deep clean, the burr gap opens back up. Your setting 10 grind is now too coarse. You have to move back to 7-8. People call this "recalibration," but it's really just returning to the true burr gap after removing the oil layer.
The Fix
Deep clean burrs every 3-4 months or every 10 lbs of beans, whichever comes first. Disassemble the grinder, remove the burrs, brush off loose grounds, then wipe with a microfiber cloth dampened with water (not soap - it leaves residue). Let burrs dry completely before reassembly.
Daily: brush out the chute and exit spout. Weekly: vacuum the grind chamber. Monthly: wipe down the hopper if you use one (oils from beans transfer to the hopper walls).
Some people use grinder cleaning tablets (Urnex Grindz, Full Circle). These work by abrading oil off the burrs as you grind. They're faster than disassembly but less thorough. If you use tablets, follow with a 5g purge of real beans to clear residue.
After deep cleaning, expect to re-dial your grind setting. Don't panic when your old setting doesn't work. The burr gap has changed. Start your dialing process from scratch and log the new setting.
When Grinder Problems Aren't User Error
Sometimes inconsistency isn't technique. It's the grinder. Signs your grinder has a mechanical problem:
- Grind consistency varies batch to batch even with identical settings, beans, and prep
- You've reached the finest setting but shots still run too fast (burr carrier has loosened or threads have stripped)
- You hear grinding or rubbing sounds that weren't there before (burr misalignment or loose retention ring)
- The adjustment dial spins freely without stopping at detents (stepped grinder) or the collar rotates without resistance (stepless grinder)
Entry-level grinders (Breville Smart Grinder Pro, Capresso Infinity, Bodum Bistro) use plastic adjustment collars and small motors. These wear out after 12-18 months of daily use. If you're pulling 2-3 shots per day on a $150 grinder, plan for replacement or upgrade around the 18-month mark.
Mid-range grinders (Baratza Sette, Eureka Mignon, DF64) have replaceable burrs and better motors. When performance drops, replace the burrs ($60-100) instead of the grinder. Steel burrs last 500-800 lbs of coffee. Ceramic burrs last 1,200-1,500 lbs but chip more easily.
Quick Troubleshooting Checklist
Shot too fast (under 25 seconds, sour taste):
- Grind 1 step finer
- Check dose - are you filling the basket to capacity?
- Increase tamp pressure to 30 lbs
- Purge 2g to clear retention
Shot too slow (over 35 seconds, bitter taste):
- Grind 1 step coarser
- Check for overfilling - excess coffee at the rim creates uneven resistance
- Reduce dose by 0.5-1g
- Verify tamp is level
Inconsistent shots (time swings ±5 seconds with same settings):
- Use RDT or bellows to reduce retention
- Standardize tamp pressure (calibrated tamper or practice)
- Purge 1-2g after the grinder has been idle for 2+ hours
- Check for channeling - tamp evenly, distribute grounds before tamping
Shots suddenly changed after weeks of consistency:
- Bean age - are you 3+ weeks into the bag?
- Burr buildup - time for a deep clean
- Humidity shift - adjust grind 1 step finer on humid days
- New bag of same roast - different roast date affects degassing
The Bottom Line
Grinder mistakes compound. Adjusting under load damages burrs. Not purging after adjustments creates phantom inconsistency. Chasing grind when dose or tamp is the real problem wastes beans and time. Skipping maintenance drifts your baseline.
The fix isn't a $1,500 grinder. It's treating your current grinder like a precision instrument. Move 1 step at a time. Purge after adjustments. Stop the motor before turning the dial. Log your settings. Clean every 3 months.
When you control these variables, even a $300 grinder will give you repeatable, dialed-in shots. The beans, the roast, and the age still matter. But those factors are predictable. User error is the biggest source of inconsistency, and it's the easiest to fix.
Related Reading
- Best Espresso Grinders Tested: Flat vs Conical Burrs, Single-Dose, Budget to High-End
- Espresso Grind Size Mastery: Fix Every Shot Problem
- How to Dial In Espresso: Step-by-Step Guide
FAQ
How much should I adjust my espresso grinder at a time?
Adjust by 1 step at a time, then pull a test shot. Each step changes extraction time by 2-5 seconds. Larger jumps make dialing in impossible because you skip past the right setting. If a shot runs 20 seconds and you want 27 seconds, move 1-2 steps finer and test again. Grind adjustment is iterative, not binary.
Should I adjust my grinder while it's running?
No. Adjusting while grinding puts lateral force on the burrs and motor, which can cause misalignment, burr chipping, or premature motor wear. Always stop the grinder, make your adjustment, then restart. Some high-end commercial grinders allow on-the-fly adjustment, but home grinders should be adjusted at rest.
How do I know if my grinder needs recalibration?
Signs of calibration drift: (1) you've reached the finest setting but shots still run too fast, (2) grind consistency varies batch to batch, (3) you hear rubbing or grinding sounds, or (4) you recently deep-cleaned the burrs and now your dialed-in setting no longer works. Recalibration resets the burr gap. Most home grinders need this every 12-24 months depending on use.
Why do my espresso shots taste different with the same grind setting?
Same setting, different shot: retention. Most grinders hold 0.5-2g of old grounds between the burrs and chute. When you change beans or wait hours between shots, the first pull uses old grounds mixed with new. Purge 1-2g of beans after adjustments or bean changes. Single-dose grinders reduce this problem but don't eliminate it.
Do I need to adjust grind size for darker roasts vs lighter roasts?
Yes. Darker roasts are more porous and extract faster, so grind slightly coarser or reduce dose by 0.5-1g. Lighter roasts are denser and need finer grinds or longer preinfusion. If you dial in for a medium roast at setting 8, expect to move 1-2 steps coarser for dark roast and 1-2 steps finer for light roast, then fine-tune from there.
How often should I clean my espresso grinder?
Deep clean burrs every 3-4 months (or every 10 lbs of beans). Weekly: brush out the chute and grounds bin. Daily: purge 1-2g to clear retention. Oil buildup on burrs creates uneven particle distribution and stale flavors. After deep cleaning, expect to recalibrate or re-dial your grind setting because burr spacing changes when old coffee residue is removed.