How to Dial In Espresso: A Step-by-Step Guide
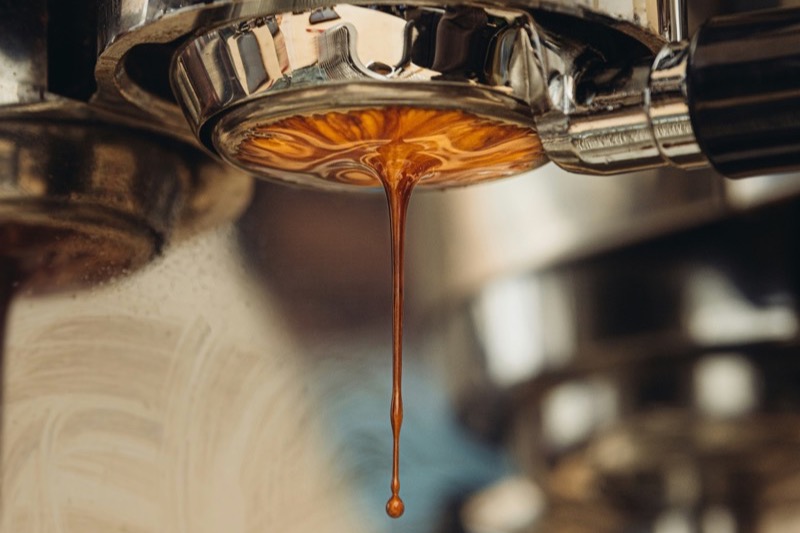
Table of Contents
- What is Dialing In and Why It Matters
- The Espresso Recipe: Dose, Yield, and Time
- Grind Size: Your Primary Dialing Lever
- The Step-by-Step Dial-In Workflow
- Reading the Shot: Visual and Taste Indicators
- What the Taste Tells You
- Dose Adjustments and Yield
- Temperature as a Variable
- Keeping a Shot Log
- Common Mistakes and How to Fix Them
- Frequently Asked Questions
What is Dialing In and Why It Matters
"Dialing in" is the process of adjusting your grind size, dose, and tamping pressure to pull espresso shots that taste balanced and consistent. It's the single most important skill in home espresso because dialing in determines the difference between weak, sour shots and rich, balanced ones.
When you first pull espresso from a new machine or coffee, you won't have the right settings. The shot might run too fast (under 20 seconds), tasting thin and sour. Or it might run too slow (over 35 seconds), tasting harsh and over-extracted. Dialing in is the process of making small adjustments until you hit the sweet spot where extraction time is 25-30 seconds and the shot tastes complex and balanced.
Here's why this matters: you could have a $2,000 espresso machine and great coffee beans, but if you haven't dialed in, you'll still pull mediocre shots. Conversely, you could have a $400 machine and nail your dial-in process, and you'll pull shots that rival cafes. Dialing in is where the real skill lives.
The good news is that dialing in follows a logical, repeatable process. Once you understand the fundamentals, you'll be able to dial in any coffee in 5-10 minutes, and then pull consistent, delicious shots for days.
The Espresso Recipe: Dose, Yield, and Time
Espresso is a recipe, just like baking. Three variables matter: how much coffee (dose), how much liquid comes out (yield), and how long the water contacts the coffee (time).
Dose: How Much Coffee
Dose is the weight of ground coffee you put in the portafilter, measured in grams. For most home machines with a 54mm or 58mm portafilter, you'll dose between 16-20 grams. A common starting point is 18 grams of coffee.
Why 18 grams? Because it's a standard amount that works with most baskets and machines. It's enough coffee to extract well but not so much that you overflow the basket or create excessive resistance. As you gain experience, you might adjust dose up or down (17g for lighter, 19g for richer), but 18g is your baseline.
Yield: How Much Espresso Comes Out
Yield is the weight of espresso (liquid + crema) that flows into your cup. This is where the famous 1:2 ratio comes in.
The 1:2 ratio means one part coffee to two parts water. (This is the standard recommended by the Specialty Coffee Association.) If you dose 18g of coffee, your target yield is 36g of espresso. This ratio produces balanced extraction with good body and sweetness. Some people prefer 1:1.5 (more concentrated, shorter drinks), others prefer 1:2.5 (more dilute, larger drinks), but 1:2 is the starting point.
How do you measure yield? With a scale. You place your cup on a scale, start the pump, and watch the grams increase. When it hits 36g, you stop. This is called "weighing your shots" and it's non-negotiable if you want consistency.
Time: Extraction Duration
Extraction time is measured from the moment you start the pump until the last drops fall into the cup. With proper dose and yield, extraction time should be 25-30 seconds. This window is where balanced extraction happens.
If you're pulling 18g of coffee and hitting 36g yield in 25 seconds, you're nailing it. If it happens in 18 seconds, your grind is too coarse and you'll get sour, under-extracted shots. If it takes 40 seconds, your grind is too fine and you'll get bitter, over-extracted shots.
Why These Three Numbers Matter
These three variables are interconnected. Change one and you affect the others. That's what makes dialing in both challenging and rewarding:
- Too coarse grind: Water runs through fast (under 20 sec), yield is too high, shot tastes sour
- Too fine grind: Water can't get through fast enough (over 35 sec), yield is low or stuck, shot tastes bitter
- Too light tamp: Water channels through, shot runs fast, tastes sour
- Too heavy tamp: Water can't penetrate, shot runs slow, tastes bitter or chokes the machine
- Wrong dose: Too little coffee = weak extraction, too much = resistance and slow flow
The key insight: grind size is your primary lever for dialing in. Dose and tamp are supporting variables, but grind is where most adjustment happens.
Grind Size: Your Primary Dialing Lever
Grind size is the most powerful tool for dialing in espresso. A tiny change in grind size (just a few notches on your grinder) can shift extraction time by several seconds and completely change how the shot tastes.
How Fine Should Espresso Grind Be?
Espresso grind should be very fine, finer than pour-over or filter coffee. Think of powdered sugar or table salt -- that's the texture you're aiming for. Some particles will be slightly larger, some slightly smaller, but the overall consistency should be very fine.
If you're used to grind settings on a scale (like 1-10), espresso should be around 8-10 (very fine end). If you're using a grinder with step numbers (like Baratza Encore's 1-40 scale), espresso is typically around 5-10. But these are just starting points -- your exact setting depends on your specific grinder, machine, and coffee.
The Grind Adjustment Rule
When you dial in, you're adjusting grind size based on how fast or slow your shot flows. Here's the rule:
- Shot runs too fast (under 20 seconds)? Grind FINER. Smaller particles create more resistance, slowing the flow.
- Shot runs too slow (over 35 seconds)? Grind COARSER. Larger particles create less resistance, speeding the flow.
- Shot time is 25-30 seconds? You're dialed in.
Each time you adjust, change by only a small amount -- one or two notches on your grinder. Make the adjustment, pull a shot, measure the time, taste it, and repeat. Small adjustments converge on the right setting quickly.
Consistency Matters: Burr Grinders Only
For espresso, you MUST use a quality burr grinder (either conical or flat burrs). Blade grinders produce inconsistent particle sizes, which creates channeling and weak extraction. You won't be able to dial in with a blade grinder.
Among burr grinders, consistency matters. A $40 grinder will work but won't hold grind settings as precisely as a $200+ grinder. If you can only afford a $40 grinder, start there and upgrade later. But if you're budget-flexible, invest in the grinder first -- it's where precision matters most. (See our best espresso grinder guide for picks at every budget.)
Grinder Retention and Dialing In
When you change grind settings, most grinders retain some coffee inside the burrs. This means your first few shots after a grind adjustment will still have some of the old, coarser/finer grind mixed in. You need to purge the grinder by running it for a few seconds without catching the grounds, or by grinding 2-3 "throwaway" shots that you discard before your dial-in shots.
This is why espresso dialing in takes a bit of coffee and patience. But it's worth it -- once dialed in, you'll have delicious shots for days.
The Step-by-Step Dial-In Workflow
Here's the exact process to dial in espresso. Follow these steps and you'll converge on the right grind setting quickly.
Step 1: Prepare Your Equipment
- Get a kitchen scale. You need to measure dose (grams of coffee) and yield (grams of espresso).
- Get a timer or use your phone's stopwatch.
- Have a tamper. It should be flat and fit your portafilter snugly (no wobble).
- Have espresso cups or small glasses ready.
- Clean your group head and portafilter to remove any old coffee residue.
Step 2: Dose and Distribute
- Place your portafilter on the scale, tare it to zero.
- Grind coffee into the portafilter. Start with 18 grams as a baseline. (If this is a new coffee or machine, start with a coarser grind than you think you need.)
- The portafilter should be full but not overflowing. Tap it gently on the counter 3-4 times to settle the grounds and remove air pockets.
- Visually inspect the grounds. They should be level with the top of the basket, no high spots or valleys.
Step 3: Tamp with Even Pressure
- Place the portafilter under the tamper.
- Apply steady downward pressure (about 30 pounds of force -- firm but not extreme). The key is even, level pressure. Don't rock or twist the tamper.
- Tamp straight down, hold for one second, then release.
- The tamped puck should be flat and compact, with no loose grounds around the edges.
Tamping tip: Inconsistent tamping ruins dialing in. Make sure you're tamping level and with the same pressure every shot. Some people use a leveling tool (a small device that ensures the puck is level before tamping) to dial out this variable.
Step 4: Wipe and Insert
- Wipe the bottom of the portafilter with a dry cloth to remove excess grounds.
- Insert the portafilter into the group head and lock it in place.
Step 5: Pull the Shot and Measure
- Place your cup on the scale and tare it to zero.
- Start the pump and immediately start your timer.
- Watch the espresso flow. The first few drops should be slow. As the puck settles, flow should increase and then level out.
- Watch the scale. When it reaches your target yield (36g for a 1:2 ratio with 18g dose), stop the pump.
- Note your extraction time. You're aiming for 25-30 seconds.
Step 6: Taste and Evaluate
- Immediately taste the shot while it's still warm. Don't wait.
- Ask yourself: Does it taste sour? Bitter? Balanced?
- Think about the mouthfeel. Is it thin and watery (under-extracted)? Or thick and heavy (over-extracted)? Or smooth and sweet (balanced)?
Step 7: Adjust and Repeat
- If shot ran too fast (under 20 sec) and tasted sour: Grind finer and pull another shot.
- If shot ran too slow (over 35 sec) and tasted bitter: Grind coarser and pull another shot.
- If shot was 25-30 sec and tasted balanced: You're dialed in. Pull 2-3 more shots to confirm consistency.
Repeat steps 2-7 until you dial in. Most coffees take 5-10 shots to dial in properly. Don't get frustrated -- this is normal and part of the process.
Step 8: Lock In Your Settings
- Once you've pulled 3 consistent shots (all 25-30 seconds, all taste balanced), write down your grind setting.
- Note the date, coffee name, dose, and yield.
- This is your baseline for this coffee. You can pull great shots from here for the next week or two.
Reading the Shot: Visual and Taste Indicators
What to Look for While Pulling
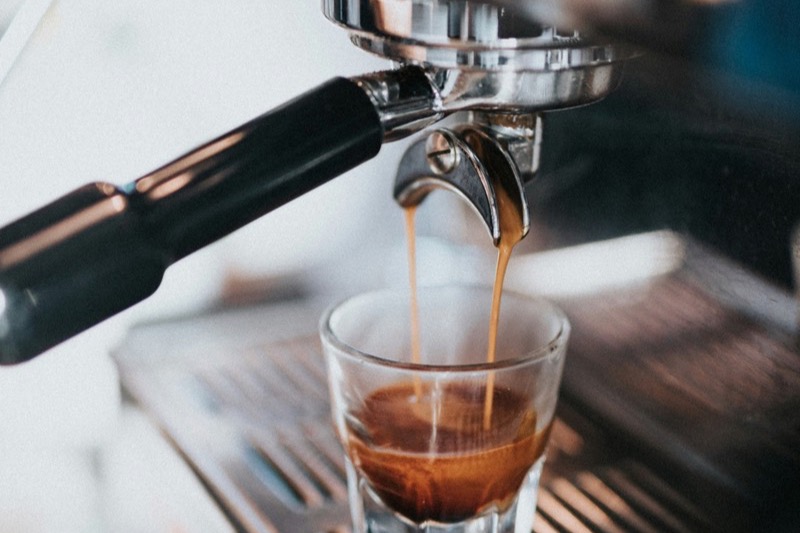
Pre-infusion (first 3-5 seconds): When you first start the pump, the water should slowly saturate the puck. You might see a few drops come out immediately, then a pause, then a steady stream. This is normal. The pause is the water finding pathways through the coffee.
Main extraction (5-25 seconds): Once flow starts, espresso should come out in a steady, even stream. The color should be brown, darkening slightly as you pull. If the stream is too fast or choppy, your grind is too coarse. If the stream is barely trickling, your grind is too fine.
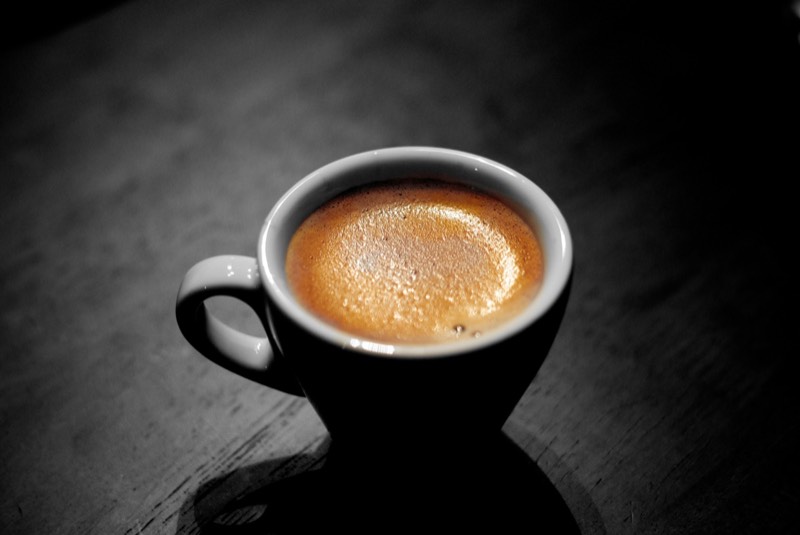
The blond line (20-30 seconds): As you reach the end of extraction, the color lightens and becomes more golden or "blond." This is because you're extracting less of the solubles and more water is flowing through. The blond line tells you extraction is wrapping up.
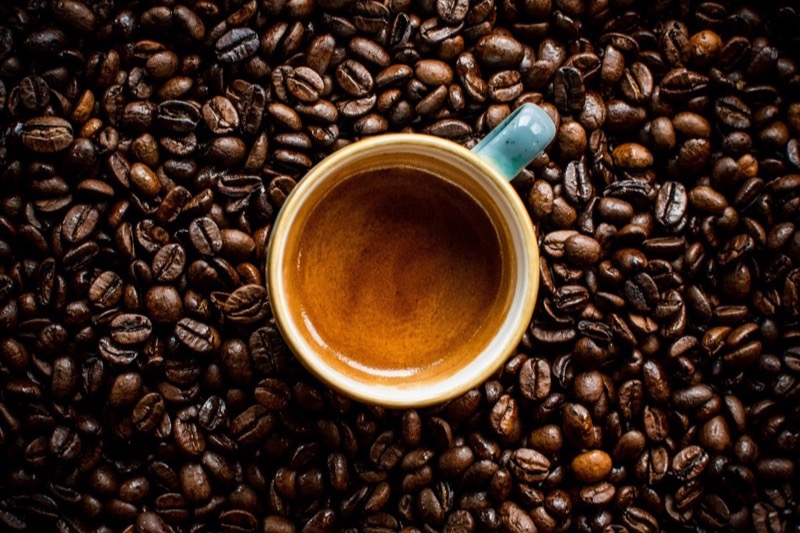
Crema (top of the cup): A well-extracted shot produces crema -- a layer of golden-brown foam on top. Rich, reddish-brown crema is a good sign. Thin or whitish crema can mean channeling or over-extraction. Crema should persist for at least 30 seconds in the cup.
Reading Specific Flow Problems
Gushing: Espresso comes out immediately and fast (too fast to measure yield carefully). The stream is large and uncontrolled. This means channeling -- water found the path of least resistance and blasted through the puck instead of extracting evenly. Cause: grind is too coarse, tamp is too light, or distribution is uneven. Fix: grind finer, tamp harder, or use a leveling/distribution tool.
Slow drips: Only a few drops come out per second. The stream is thin or nonexistent. The machine might "choke" (stop flowing completely). This means your grind is too fine. The water can't find a path through the puck. Fix: grind coarser immediately.
Uneven flow: The stream comes from one side of the portafilter, not evenly from the entire surface. This means uneven distribution or tamping. Fix: use a distribution tool before tamping, and tamp with level pressure.
What the Taste Tells You
The flavor of espresso tells you whether extraction is balanced or not. Learn these taste profiles and you'll know instantly what to adjust.
Sour Espresso (Under-Extraction)
Sour espresso tastes tart, sharp, and thin. It's like biting a lemon. The mouthfeel is watery and lacks body. The shot is missing sweetness and complexity.
What's happening: Water didn't spend enough time pulling flavors from the coffee. You extracted only the acidic compounds early in the puck, missing the sweet and complex flavors that come later.
Causes:
- Grind is too coarse (water flows through too fast)
- Extraction time is under 20 seconds
- Tamp is too light or uneven
- Coffee dose is too low
How to fix: Grind finer. This is the primary fix. If you're already grinding very fine and still getting sour shots, tamp harder or use more coffee (dose up to 19g).
Bitter Espresso (Over-Extraction)
Bitter espresso tastes harsh, ashy, and burnt. It's mouth-puckering in a bad way. The mouthfeel is thick and heavy, sometimes almost creamy, but the flavor is unpleasant. The shot is flat and one-dimensional.
What's happening: Water spent too long in contact with the coffee. You extracted all the early, sweet compounds and kept pulling until you got the harsh, bitter compounds that hide deeper in the puck.
Causes:
- Grind is too fine (water flows through too slowly)
- Extraction time is over 35 seconds
- Tamp is too hard or uneven (creating resistance)
- Coffee dose is too high
- Water temperature is too high
How to fix: Grind coarser. This is the primary fix. If you're already grinding coarse and still getting bitter shots, tamp lighter or reduce dose (down to 17g).
Balanced Espresso (Proper Extraction)
Balanced espresso tastes sweet, complex, and clean. You can taste multiple flavors -- maybe chocolate, caramel, fruit notes, or floral undertones depending on the coffee. The mouthfeel is smooth and full-bodied but not heavy. The shot has clarity and doesn't taste one-dimensional.
What's happening: Extraction time is 25-30 seconds and you've extracted the full range of flavors from the coffee in balanced proportions.
Signs you're dialed in:
- Extraction time is consistently 25-30 seconds
- Yield is at your target ratio (36g for 1:2 with 18g dose)
- Taste is sweet and complex, not sour or bitter
- Crema is rich and persists in the cup
- You can pull 3+ shots that taste identical
Once you hit this, lock in your settings and enjoy consistent shots for the next week or so.
Dose Adjustments and Yield
While grind size is your primary dialing lever, dose (grams of coffee) and yield (grams of espresso) are supporting tools that refine your shots.
When to Adjust Dose
Dose affects how much resistance the puck creates and how much you can extract. If you're at the edge of your grinder's range (grinding super fine or super coarse) and still not getting 25-30 seconds, adjusting dose can help.
- Dose up (to 19g or 20g): If you're grinding very coarse and shots are still running fast, more coffee creates more resistance. This helps slow down fast shots without grinding even coarser.
- Dose down (to 17g): If you're grinding very fine and shots are still running slow, less coffee creates less resistance. This helps speed up slow shots without grinding even finer.
But this is a supporting adjustment. Your primary move is always grind.
The 1:2 Ratio and Variations
The 1:2 ratio (one part coffee to two parts water) is the standard baseline. But personal preference varies:
- 1:1.5 ratio (ristretto): Smaller, more concentrated shots. 18g coffee → 27g espresso. Bolder, stronger flavor.
- 1:2 ratio (standard): 18g coffee → 36g espresso. Balanced, full-bodied, versatile.
- 1:2.5 ratio (lungo): 18g coffee → 45g espresso. Larger, more dilute shots. Lighter body, less intensity.
Start with 1:2 and dial in there. Once you're comfortable, experiment with other ratios to find your preference. Some people love the intensity of 1:1.5, others prefer the ease of drinking a 1:2.5. There's no "right" ratio -- only the one you prefer.
Weighing Your Shots
To dial in properly, you MUST measure yield with a scale. Here's why: if you pull shots "to taste" without measuring, you'll never know if your 25-second shot was actually 36g of espresso (1:2 with 18g dose) or some other ratio. Without measuring, you can't diagnose problems accurately.
Using a scale takes 10 seconds longer per shot, but it gives you the data you need to dial in intelligently.
Temperature as a Variable
Water temperature is a variable that affects extraction and taste. However, it's less important than grind size for dialing in. Most machines have temperature control built-in, so this is mentioned more for completeness and advanced troubleshooting.
How Temperature Affects Extraction
Higher water temperature extracts faster and more completely. This means:
- Higher temp (90-93°C): Faster extraction, more sweetness and body, can over-extract quickly
- Medium temp (88-90°C): Balanced extraction, good for most coffees
- Lower temp (85-88°C): Slower extraction, brighter acidity, requires longer pull times
Most espresso machines aim for 90°C by default. If your machine has temperature control (PID), you can adjust it. But for home use, stick with the default temperature while you're learning to dial in grind.
When to Adjust Temperature
Adjust temperature only after you've mastered grind dialing. And only in these scenarios:
- Coffee tastes sour even though grind is fine and extraction time is 25-30 seconds: Try lowering temp by 1-2°C to slow extraction.
- Coffee tastes bitter even though grind is coarse and extraction time is 25-30 seconds: Try raising temp by 1-2°C to speed extraction.
Temperature is a fine-tuning tool. Grind is the main lever. Master grind first, then explore temperature.
Keeping a Shot Log
A shot log is a simple record of each espresso shot you pull: the date, coffee name, grind setting, dose, yield, extraction time, and taste notes. This log becomes invaluable for dialing in and improving over time.
What to Record
Create a simple spreadsheet or notebook and log:
- Date: March 9, 2026
- Coffee: Ethiopia Yirgacheffe, Local Roaster
- Grind Setting: 7 (or your grinder's notation)
- Dose: 18g
- Yield: 36g
- Time: 27 seconds
- Taste Notes: Balanced, sweet caramel, clean finish
- Notes: Dialed in! Use this setting for next week.
Why This Helps
A shot log does three things:
- Creates accountability: Writing things down makes you observe more carefully and dial in systematically instead of randomly adjusting.
- Builds patterns: Over time, you'll notice that certain grind settings work well with certain coffees, certain temperatures work better with darker roasts, etc.
- Saves time next time: When you buy the same coffee again, you can look up your previous grind setting and start from there instead of re-dialing from scratch.
A detailed shot log is the difference between dialing in in 3 shots and dialing in in 10 shots. It's worth the effort.
Common Mistakes and How to Fix Them
Mistake 1: Changing Multiple Variables at Once
What happens: You grind finer AND tamp harder AND increase dose all at once. Now the shot runs slow and tastes bitter. But which change caused it? You can't tell.
Why it's a problem: You can't isolate cause and effect. You'll make slower progress toward dialing in and become frustrated.
Fix: Change ONE variable at a time. Pull a shot, taste it, adjust grind by one notch, pull again. This is slower but teaches you cause and effect clearly.
Mistake 2: Not Purging the Grinder
What happens: You change grind settings and immediately pull a shot. The first shot has a mix of the old grind and new grind, so it doesn't reflect your new setting.
Why it's a problem: You adjust based on a shot that doesn't represent your actual grind setting. You make unnecessary adjustments and dial in takes longer.
Fix: After changing grind, run the grinder for 3-5 seconds into the trash to purge old grounds. Then pull your dial-in shot. This ensures the shot reflects your new setting.
Mistake 3: Not Weighing Shots
What happens: You pull shots without measuring yield. You're pulling "by eye" and timing, but not measuring grams of espresso.
Why it's a problem: Without measuring yield, you don't know if you're hitting your target ratio (1:2). A 25-second shot could be 30g, 36g, or 45g of espresso. Different yields mean different extraction profiles and different tastes. You can't diagnose problems accurately.
Fix: Get a cheap kitchen scale ($20) and weigh every shot during dial-in. This takes 5 extra seconds and gives you the data you need.
Mistake 4: Inconsistent Tamping
What happens: You tamp harder on one shot, lighter on another. Your tamping pressure varies shot to shot.
Why it's a problem: Inconsistent tamping creates inconsistent extraction. Shots that should taste identical taste different. You can't tell if a problem is from grind or from tamping.
Fix: Focus on tamping consistency. Tamp with the same pressure every time (firm, level, straight down). If this is difficult, consider a leveling tool or a motorized tamper. These aren't required, but they help lock out the tamping variable while you're learning.
Mistake 5: Giving Up Too Early
What happens: You pull 3 shots, don't dial in immediately, and decide espresso is too hard. You give up.
Why it's a problem: Dialing in takes 5-15 shots on average. You need patience and systematic adjustment. One or two shots of failure doesn't mean you're doing something wrong.
Fix: Commit to 10 shots. Follow the workflow systematically, adjust grind one notch at a time, and you'll almost always dial in by shot 10. The process works -- it just requires consistency.
Mistake 6: Not Tasting the Shots
What happens: You pull shots, measure the time, and move on without tasting them.
Why it's a problem: Taste tells you whether your extraction is balanced or not. If you only measure time, you're missing half the data. A 27-second shot tastes different from a 27-second over-extracted shot (time doesn't tell the whole story).
Fix: Always taste your shots immediately while warm. Taste teaches you what balanced extraction feels like on your palate. This sensory learning is crucial for becoming a better espresso maker.
Frequently Asked Questions
How long should espresso extraction take?
Espresso extraction should take 25-30 seconds from the moment you start the pump to when the last drops fall. This window is where balanced extraction happens. Under 20 seconds = under-extracted (sour). Over 35 seconds = over-extracted (bitter). The 25-30 second zone is your target.
What grind size should I use for espresso?
Very fine, similar to powdered sugar or table salt. The exact setting depends on your grinder and machine, but fine is the ballpark. If shots run too fast, grind finer. If shots run too slow, grind coarser. Your grind setting is determined by how fast or slow your water flows through the puck.
Why does my espresso taste sour?
Sour espresso means under-extraction -- water isn't spending enough time extracting the coffee. This happens when: (1) grind is too coarse, (2) tamp is too light, or (3) dose is too low. Fix by grinding finer, tamping harder, or using more coffee. The primary fix is always grinding finer.
What is the golden ratio for espresso?
The golden ratio is 1:2 -- one part coffee to two parts water by weight. Dose 18g of coffee, pull 36g of espresso. This ratio produces balanced extraction with good body and sweetness. Some prefer 1:1.5 (more concentrated), others 1:2.5 (more dilute), but 1:2 is the starting point.
How do I know when espresso is dialed in?
Espresso is dialed in when: (1) extraction time is 25-30 seconds consistently, (2) yield matches your target ratio (36g for 1:2 with 18g dose), (3) taste is balanced and sweet (not sour or bitter), and (4) you can pull multiple identical shots. You'll know it when you taste it -- dialed-in shots are clear, complex, and satisfying.
Can I dial in without a scale?
Technically, you can dial in using only time and taste. But a scale makes it much faster and more accurate. A scale costs $20-30 and tells you whether you're hitting your target ratio. Highly recommended. Without measuring yield, you're flying blind and making slower progress.
How many shots does it take to dial in?
Usually 5-15 shots depending on the coffee and how far off you start. If you start way too coarse, you might dial in in 3-4 shots. If you start in the wrong ballpark, it takes longer. Follow the system and by shot 10 you'll almost always be dialed in. Keep detailed notes so next time with a similar coffee you can dial in in 2-3 shots.
Does water temperature affect my shots?
Yes, but less than grind size. Higher temp extracts faster and more completely. Most machines are set to 90°C by default. If you're new to espresso, leave temperature alone while you dial in grind. Once you're comfortable, experiment with temp ±1-2°C for fine-tuning taste.
Should I use pressurized or non-pressurized baskets?
Non-pressurized baskets teach you real espresso fundamentals. Pressurized baskets hide your mistakes and prevent skill development. Start with non-pressurized (most quality machines come with them). If you have pressurized baskets, you can buy non-pressurized upgrades for $10-15. (Not sure if you want a manual espresso machine or a pod system? See our Nespresso vs espresso comparison.)
Next Steps: From Dialed In to Consistency
Once you dial in, the next step is pulling consistent shots day after day. Here's how:
Keep Your Settings Written Down
Write down your dialed-in grind setting, dose, and yield. Don't rely on memory. Next morning, set your grinder to that notch and pull a shot. If it's 25-30 seconds and tastes balanced, you're good. If it's off by a few seconds, make a tiny adjustment.
Coffee Freshness Matters
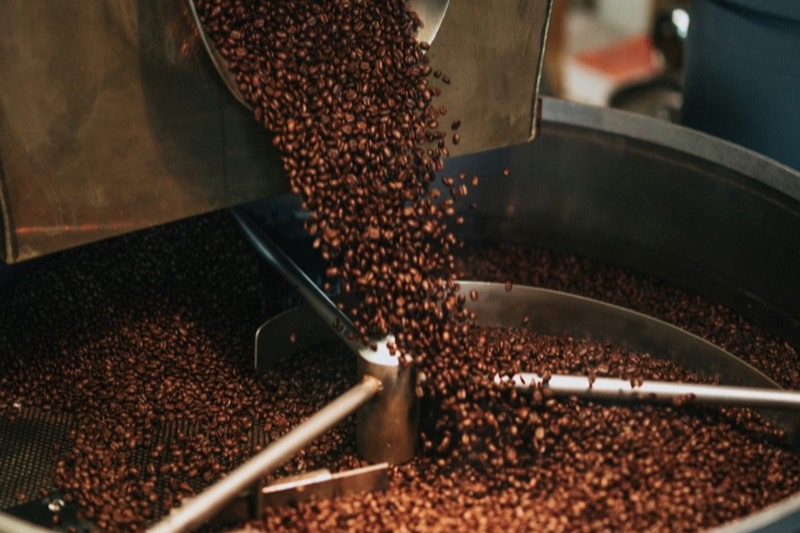
Coffee beans are freshest 5-10 days after roasting. Espresso tastes best at day 5-14. After that, flavor fades. If your dialed-in shot suddenly tastes off, it might be because your beans are aging. You might need to adjust grind slightly (older beans often need finer grinds). Expect to re-dial in with new bags of coffee.
Seasonal Adjustments
Summer humidity and winter dryness affect beans. Your dial-in from winter might need tweaking in summer. This is normal. Keep your shot log updated with seasonal notes so you can remember what worked.
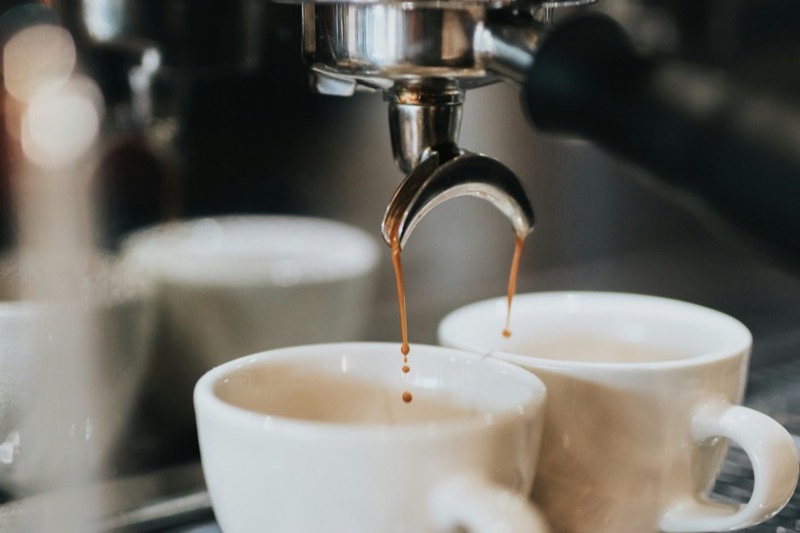
Pull the Same Shot Multiple Times
Once dialed in, pull 2-3 shots consecutively and compare them. Do they taste identical? Do they all hit 25-30 seconds? If yes, you're ready for everyday use. If no, your process has inconsistencies (tamping, distribution, dose). Fix those before moving on.
Dial In on Fresh Coffee
Always dial in on the freshest coffee you have (days 5-10 after roasting). Dialing in on old beans creates bad baselines because extraction changes as beans age.
Upgrade to a Quality Grinder When You Can
Grinder quality directly affects how consistent and repeatable your shots are. If you have a budget grinder, save up for an upgrade ($200-400 range). A quality grinder makes a huge difference in dialing in and shot repeatability.
Final Thoughts
Dialing in espresso looks complicated at first -- there are so many variables and details. But the process is logical and repeatable. Follow the workflow, adjust grind size based on extraction time, taste for balance, and you'll dial in consistently.
The skill of dialing in is what separates people who make okay espresso from people who make excellent espresso. Once you dial in, you own the ability to pull cafe-quality shots at home, with your coffee, your machine, your preferences. That's a genuinely valuable skill.
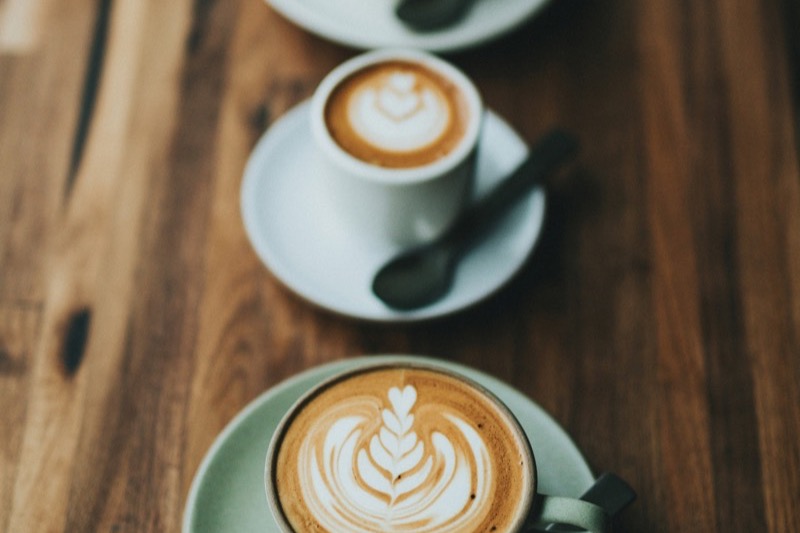
For our picks on machines that make dialing in easier, see our best home espresso machines guide. And once your shots are consistent, check out our latte art for beginners guide for your next milestone.
Start pulling shots. Keep detailed notes. Taste every shot. Adjust grind based on what you taste and see. In a week, you'll be dialing in new coffees with confidence. In a month, you'll be pulling shots that rival specialty cafes. Enjoy the process -- this is where the real espresso journey begins.