
Latte art is a skill problem, not a talent problem. The barista pulling perfect rosettas at your local cafe learned the same way you will - by understanding two mechanics: milk texture and pour control. Get those right, and patterns follow.
This guide skips the theory-heavy intros. You get the exact grip, angle, and motion sequence that produces hearts, tulips, and the beginning of rosettas - with the specific tools that make the learning curve shorter at home.
Affiliate Disclosure: EspressoSnob participates in the Amazon Services LLC Associates Program. We earn commissions from qualifying purchases through our Amazon links at no extra cost to you. We recommend products based on specifications, performance, and value, not commission rates. As an Amazon Associate I earn from qualifying purchases.
Quick Picks: Best Latte Art Tools for Beginners
| Tool | Best For | Price Range | Link |
|---|---|---|---|
| Rattleware 12oz Pitcher | Budget beginner - proven spout, reliable vortex | ~$17 | Check Price on Amazon |
| Fellow Eddy 12oz | Precision pour - fluted spout, internal markers | ~$29 | Check Price on Amazon |
| Espro Toroid 12oz | Beginner-forgiving - wide base, stable vortex | ~$24 | Check Price on Amazon |
| Milk Thermometer (clip-on) | Temperature control without guessing | ~$10 | Check Price on Amazon |
| 20oz Pitcher with Thermometer | Two-drink sessions, built-in temp indicator | ~$13 | Check Price on Amazon |
Why Most Beginners Fail at Latte Art (And How to Not Be One of Them)
The most common failure mode: over-frothed milk. Beginners see "frothing" and produce a pitcher of dry, bubbly foam that sits on top of the espresso like shaving cream. You cannot pour latte art with that foam - it clumps, it breaks, it sinks.
What you need is microfoam: steamed milk where tiny bubbles are fully integrated into the liquid, producing a glossy, silky texture that flows like wet paint. The difference between dry foam and microfoam is the difference between a failed cup and a pattern you can actually see.
The second failure mode: starting the pour too high. High pours plunge milk through the espresso crema instead of sitting on top of it. The crema is what makes patterns visible - punch through it and you get brown mud.
Fix both of those, and you are most of the way to your first heart.
What You Need Before You Start
Latte art is not possible with every setup. The minimum requirements:
- Espresso machine with a steam wand. The wand must produce real steam pressure - not a pressurized frother attachment, not a Nespresso pod machine's "steam" function. You need a metal wand that produces dry steam under pressure. Entry-level machines like the Breville Bambino, Gaggia Classic, and De'Longhi Dedica all qualify.
- A milk pitcher sized for your drink. 12oz for single drinks. 20oz for two drinks. The pitcher's spout shape determines how much control you have over the pour - more on that below.
- Fresh espresso with intact crema. Pull your shot into the cup you are going to pour into, and start pouring within 30 seconds. Crema breaks down quickly once exposed to air.
- Whole milk to start. Its fat content produces the most stable microfoam. Once you have the technique down, experiment with 2% and barista-edition oat milk.
Choosing the Right Milk Pitcher
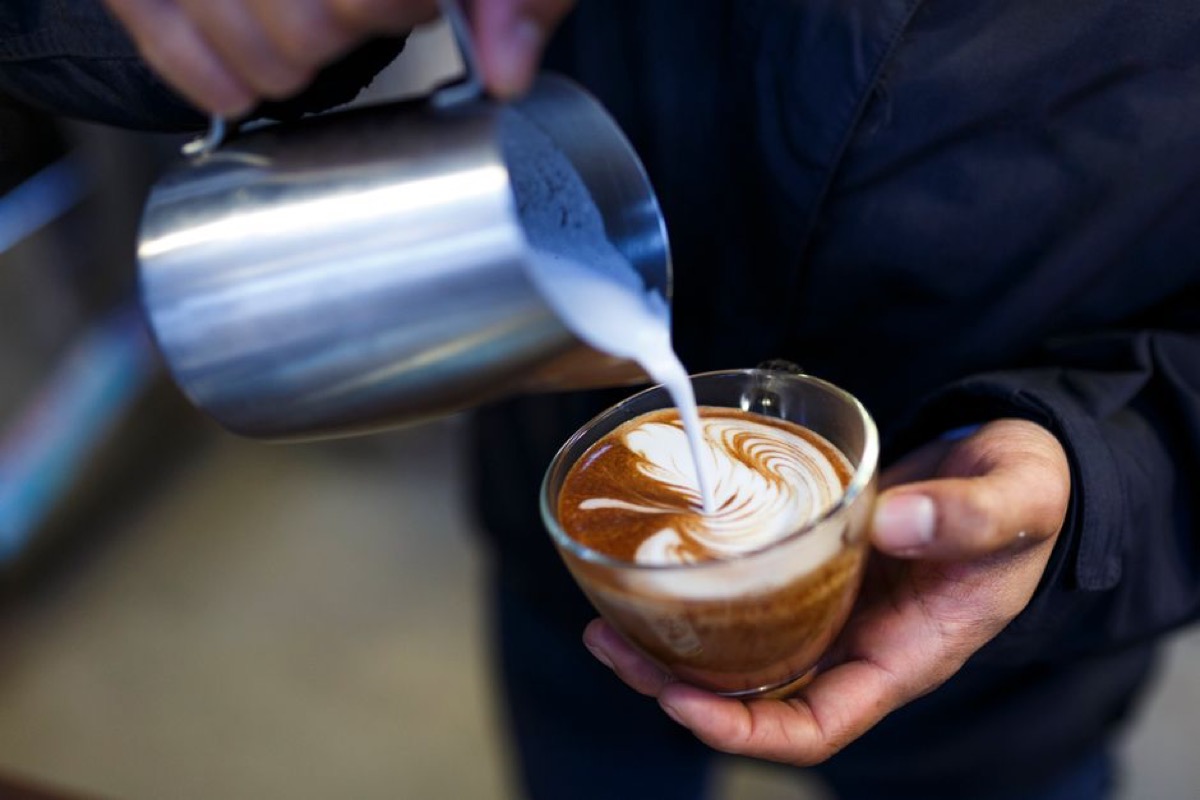
The spout is the most important feature on a milk pitcher. A narrow, tapered spout gives you a thin, directed stream for placing foam where you want it. A wide, blunt spout gives you less control - milk comes out in a broad sheet that is harder to steer into a defined pattern.
Rattleware 12oz - The Reliable Standard
The Rattleware 12oz pitcher has been the workhorse of home barista training for years because it works - reliable steel construction, a spout shaped for art pours, and a handle that lets you lock your grip without fatigue. At around $17, it is the honest answer to "what pitcher should I start with." No frills, but the geometry does what you need.
Fellow Eddy 12oz - Precision Spout for Tighter Patterns
The Fellow Eddy has a fluted, sharp-edged spout that produces a narrower, more controlled stream than most pitchers in its price range. The internal volume markers are useful for consistency - you fill to the same line each session, which removes one variable from an already variable process. If you are serious about progressing quickly, the Eddy's spout is worth the step up from the Rattleware.
Espro Toroid 12oz - Forgiving for Beginners
The Espro Toroid has a wide base that produces a stable milk vortex during steaming - which helps beginners get more consistent microfoam before they have perfected their steam wand technique. The spout is more forgiving of slightly imperfect pour angles than the Eddy, though it gives up some precision in return. Good first pitcher if you know your steam wand technique still needs work.
Temperature Control: Thermometer or Integrated
Over-steaming milk destroys the proteins that hold microfoam together. The target is 140-155 degrees F (60-68 degrees C). A clip-on milk thermometer removes the guesswork entirely - clip it to the pitcher, steam until the needle hits the green zone, stop. At around $10, it pays for itself in milk not wasted on over-steamed batches.
Alternatively, the 20oz pitcher with integrated thermometer strip eliminates the separate clip entirely. Useful if you are making two drinks at once and want to simplify setup.
Step 1 - Steam the Milk Correctly
Steaming is where latte art is won or lost. A perfect pour cannot fix bad milk. Bad milk cannot produce a pattern no matter how good your technique is.
Fill level: Fill the pitcher to just below the spout line - roughly the bottom of the spout. Too little milk and there is not enough mass to create a vortex. Too much and foam overflows before you are done.
Wand position: Submerge the steam wand tip just below the milk surface - about 1cm. Angle the pitcher slightly so the tip is off-center. When you open the steam valve, the off-center tip creates a rotational vortex that incorporates air and bubbles uniformly.
Stretching phase: For the first 2-3 seconds, keep the tip near the surface. You will hear a light "chhhh" sound as the wand introduces air into the milk. This is where you add volume. The milk will rise in the pitcher. Once you have added the volume you need (roughly 20-30% expansion for latte, less for cappuccino), drop the tip deeper into the milk.
Texturing phase: With the tip submerged, the steam creates a vortex that spins the milk. No more air is introduced - you are rolling the milk on itself to integrate the bubbles you created. This phase is what converts coarse, wet bubbles into silky microfoam. Continue until the pitcher is too hot to hold comfortably - roughly 130-140 degrees F - then stop and add another 5-10 seconds to reach your target if using a thermometer.
Post-steam: Purge the wand (open briefly to clear residual milk), wipe with a damp cloth, purge again. Then tap the pitcher firmly on the counter 3-4 times to pop any surface bubbles, and swirl the milk in a circular motion for 10-15 seconds. The finished milk should look glossy - like liquid silk, not foam. If you see any large bubbles on the surface, swirl harder and tap again before pouring.
Step 2 - Set Up the Pour
Before you introduce milk to espresso, set yourself up correctly. Errors here are hard to recover from mid-pour.
Tilt the cup. Tilt the espresso cup at roughly 30-45 degrees toward you, using your hand or resting it on the drip tray edge. This creates a longer surface for the milk to travel before hitting the crema - giving you more time and distance to position the pour.
Start position: Hold the pitcher tip 3-5cm above the center of the crema. Not touching the crema. Not 15cm above the cup. The sweet spot is close enough that the milk lands gently on the crema surface without punching through it.
Initial pour speed: Start with a slow, thin stream aimed at the center of the crema. For the first third of the pour, you are filling the cup - not making art. Keep the stream thin and centered. The crema should remain intact and the milk should flow underneath it, gradually raising the level.
Step 3 - Pour a Heart
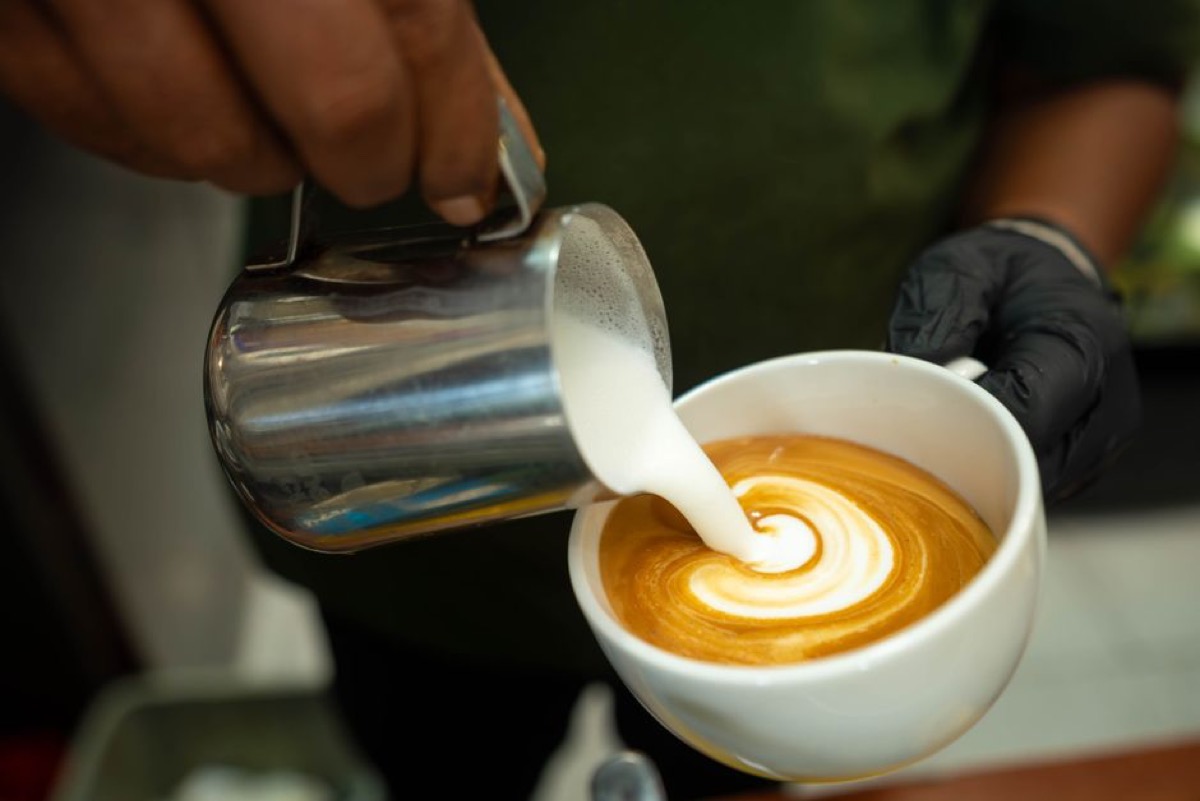
The heart is the entry pattern. It uses one continuous motion and teaches the fundamental principle of all latte art: the foam sits on top, the liquid flows underneath, and the pull-through at the end creates definition.
Phase 1 - Fill (first 40% of pour): Slow, centered stream. The cup level rises. The crema lifts but stays intact. Keep the pitcher tip 3-5cm above the surface.
Phase 2 - Drop and widen: When the cup is about half full, lower the pitcher tip until it is nearly touching the crema surface - 5-10mm above. Simultaneously increase pour speed. The faster flow of milk will push the crema aside and you will see a white circle begin to form on the surface. This is your foam floating on the crema.
Phase 3 - Wiggle for width: While the white circle grows, begin a gentle side-to-side wiggle of the pitcher - small, controlled movements of about 1-2cm. This widens the foam placement and creates the rounded top of the heart shape. Keep the tip in place; move the milk side to side by tilting the pitcher wrist slightly.
Phase 4 - Pull through: This is the move that creates the point at the bottom of the heart. Once the white dome is large enough, raise the pitcher slightly (5-8cm) and move it forward and down through the center of the white foam in a single, fluid stroke. The thin stream cuts through the white and pulls a line through the middle - this divides the circle into the two lobes of a heart and creates the point at the bottom.
The pull-through has to be smooth and committed. Hesitation at this step produces a blob, not a heart. Practice the motion in the air before you do it over milk.
Step 4 - Pour a Tulip
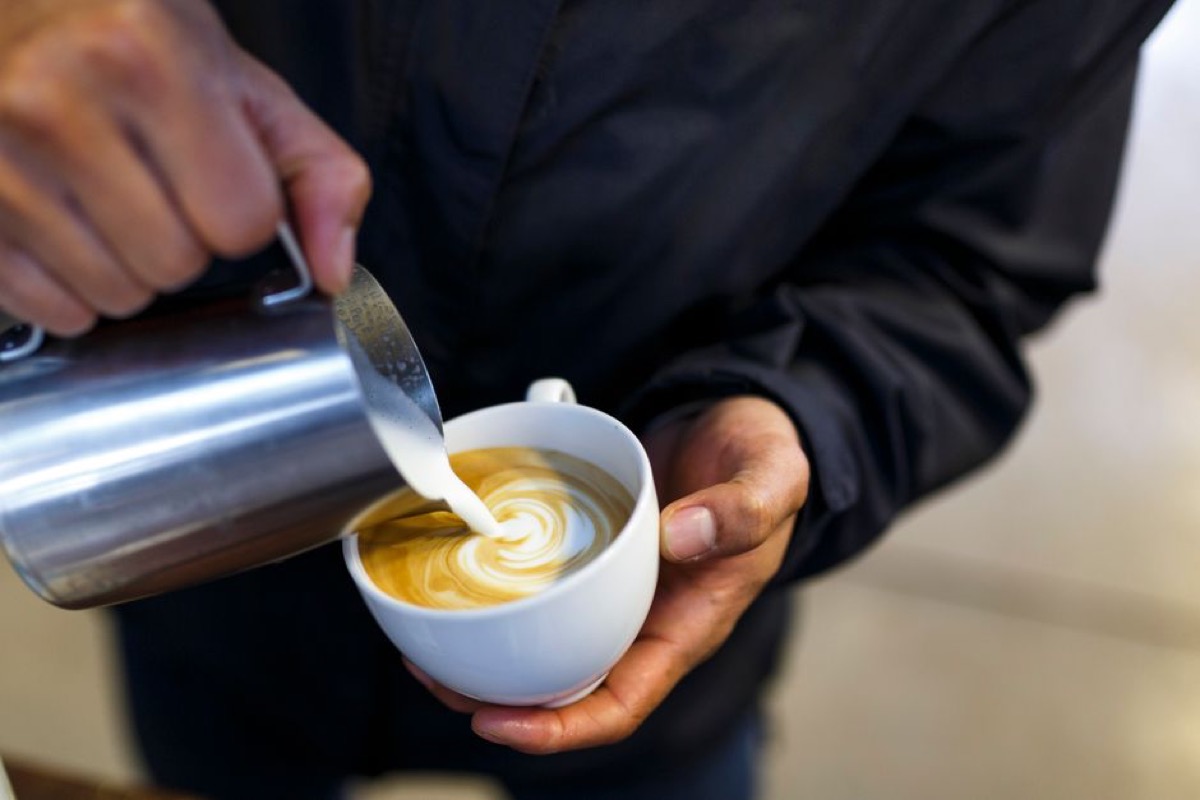
The tulip uses layered pours - each "petal" is a separate forward push of milk. The result looks more complex but uses the same fundamentals as the heart. The key difference is that you stop, reset, and go again multiple times in a single cup.
Tulip sequence - 3 petals:
- Fill phase: Same as heart - slow, centered, until cup is about 40% full.
- First petal: Drop the tip close to the crema surface, increase speed. Push forward gently while a white dot appears. Stop the forward motion - the white dot is the bottom petal. Pull the pitcher back slightly (1-2cm), reduce pour speed to thin it.
- Second petal: Drop again, push forward again from the position just above the first petal. A second white dot pushes the first one forward and down. Pull back again.
- Third petal: Repeat. The third petal pushes the previous two into a stacked layered tulip shape.
- Pull-through: Raise the pitcher and cut through all three petals with a forward stroke to the cup edge. This defines the outline and adds the stem.
The timing between petals matters. Move too fast and the petals merge into one blob. Move too slow and the milk cools and loses flow. With practice, you develop a rhythm: push, pause, reset, push.
The Rosetta - What Comes After
The rosetta (the leaf pattern you see on flat whites at specialty cafes) uses the same drop-and-widen mechanics, but adds a continuous side-to-side wiggle while simultaneously pulling back across the cup - creating defined leaves. Then the pull-through. The wiggle speed and pull-back rate determine how many leaves appear and how tight the pattern is.
Rosettas require consistent microfoam and a fluid wrist. They are harder to teach in text than they are to learn through repetition. Once you can pour reliable hearts and 3-petal tulips, the rosetta motion will make sense to your hand after another 2-4 weeks of practice.
Common Mistakes and Exact Fixes
Mistake 1: The white foam sinks immediately
Cause: Milk was over-steamed. The foam is too dry and light to float on the crema.
Fix: Steam shorter. The stretching phase should add only 20-30% volume for latte art. Longer texturing phase, less air introduction. The milk should feel heavy in the pitcher.
Mistake 2: No pattern visible - just brown crema
Cause: Pour started too high or too fast. The milk plunged through the crema instead of sitting on top of it.
Fix: Start the pour 3-5cm above the crema. Drop closer before increasing speed. The crema should remain visible until the drop-and-widen phase.
Mistake 3: Pattern appears then disappears before serving
Cause: Milk and espresso temperatures were too different, causing rapid mixing. Or crema was already breaking down before the pour.
Fix: Pull the shot first, pour within 30 seconds. Pre-warm your cup. Steam milk to the correct temperature (140-155 degrees F) so the temperature differential is not extreme.
Mistake 4: Heart pull-through creates a smear, not a line
Cause: The pitcher tip was too low during the pull-through, dragging through too much foam instead of cutting cleanly.
Fix: Raise the pitcher to 4-6cm above the surface for the pull-through. The increased height thins the stream so it cuts rather than plows.
Mistake 5: Tulip petals all merge into one
Cause: Pauses between petal pushes were too long, or pour speed dropped to zero between layers.
Fix: Keep a slow, thin stream flowing throughout - even between petals. The pause between pushes is a momentary slowdown, not a stop. Maintain enough flow to hold the surface tension that separates petals.
How to Practice Without Wasting Espresso
Pulling multiple espresso shots per practice session is expensive and limits how much repetition you can get. Two alternatives:
Water and dish soap: A drop of dish soap in a mug of water creates a crema-like surface when you pour cold milk over it. The physics are not identical, but it lets you practice pour angle, pitcher drop, and pull-through motion without using espresso. Good for building muscle memory on the sequence.
Practice on every cup you make: Even if you are not going for a perfect rosetta, attempt the motion on every cup. Consistent repetition beats scheduled practice sessions. Your hands learn the pattern long before your brain understands it.
Video yourself: Set up your phone and record your pours from above. Pattern mistakes are obvious on video that are invisible from your pouring angle. Review the footage and identify where the motion breaks down - usually in the pull-through or the wrist position during the drop.
Timeline: What to Expect
| Pattern | Typical Timeline | Main Bottleneck |
|---|---|---|
| Recognizable heart | 1-4 weeks daily practice | Milk texture consistency |
| Clean 3-petal tulip | 4-8 weeks | Pour speed control between petals |
| Defined rosetta | 2-4 months | Wrist motion and pull-back rhythm |
| Consistent rosetta on demand | 4-6 months | Microfoam consistency under pressure |
These are realistic home barista timelines - not cafe training programs with 40 practice cups per shift. If you are pulling espresso once or twice a day and attempting art each time, expect the earlier end of each range.
The 2026 Verdict
Latte art at home is achievable with any machine that has a real steam wand. The skills are learnable. The equipment investment is low - a quality 12oz pitcher and a thermometer are the only tool upgrades most beginners need beyond what they already own.
What separates baristas who figure it out from those who give up after two weeks is the milk texture step. Get silky microfoam dialed in first - practice steaming alone until the result looks glossy and flows like liquid every time. The pour mechanics will click into place once the milk is right.
Start with the Rattleware 12oz for a reliable first pitcher, add a clip-on thermometer to stop guessing at temperature, and pour a heart attempt on every cup until the muscle memory is there. Most people are surprised how quickly the first recognizable shape appears.
Related guides on EspressoSnob:
- Handheld Milk Frother vs Steam Wand: Microfoam Comparison
- Espresso Tastes Sour or Bitter? Grind and Extraction Fixes
- Espresso Channeling Fix: Tamping Technique That Works
Frequently Asked Questions
What milk is best for latte art?
Whole milk is the easiest for beginners. Its fat content produces stable, glossy microfoam that holds pattern definition. 2% works but produces slightly less stable foam. Oat milk (barista edition) is the best plant-based option. Avoid skim milk and most almond milks - they produce dry, bubbly foam that breaks apart before you can pour a pattern.
What size milk pitcher is best for latte art?
A 12 oz (350ml) pitcher is the standard starting point. It holds enough milk for one 6-8 oz latte while keeping the pour volume manageable. A 20 oz pitcher suits two-drink sessions. Pitchers smaller than 8 oz are too cramped for consistent vortex formation.
How do I know when milk is textured correctly?
Correctly textured milk looks like glossy, wet paint - uniform, silky, no visible bubbles. Temperature should be 140-155 degrees F. Tilt the pitcher and swirl: the milk should flow as a single mass with a sheen on the surface. Any dry foam clumps or large visible bubbles mean the milk is over-frothed.
Why does my latte art sink instead of float?
Latte art sinks when microfoam is too thin or the pour starts too high. The foam needs density to ride on top of the espresso crema. Main causes: milk was over-steamed and the foam is dry rather than dense; the pitcher tip started too far above the cup and milk plunged through the crema; or the shot finished too long ago and crema had already broken down before the pour began.
How long does it take to learn latte art?
Most beginners produce a recognizable heart within 2-4 weeks of daily practice. Consistent tulips take 4-8 weeks. Rosettas with defined leaves take 2-4 months. The bottleneck is almost always milk texture. Once you can produce consistently silky microfoam, the pour patterns come quickly.
Do I need an espresso machine to practice latte art?
Yes. Latte art requires crema (the brown foam on espresso) and steamed microfoam. A real steam wand produces the integrated microfoam needed. Handheld frothers produce dry, unstable foam that will not hold pour patterns. For practicing pour mechanics without espresso shots, use water with a drop of dish soap to simulate the crema layer.
Affiliate Disclosure: EspressoSnob participates in the Amazon Services LLC Associates Program, an affiliate advertising program designed to provide a means for sites to earn commissions by linking to Amazon.com. We earn commissions from qualifying purchases made through our Amazon links at no additional cost to you. These commissions support our research, testing, and content creation. We recommend products based on specifications, performance, and value, not commission rates. As an Amazon Associate I earn from qualifying purchases.
Photos provided by Pexels.